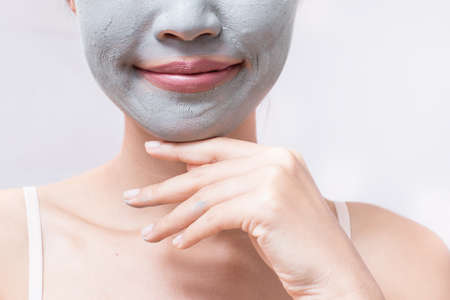
1. What Is Multimasking?
Multimasking is a smart and personalized way to take care of your skin using different face masks on different parts of your face—all at the same time. Instead of applying just one mask all over, multimasking lets you treat specific skin concerns in targeted areas. This method is perfect for people who have combination skin or deal with multiple skin issues like dryness, oiliness, and breakouts.
Think of your face as having different zones, each with its own needs. For example, your T-zone (forehead, nose, and chin) might be oily and prone to blackheads, while your cheeks could be dry or sensitive. With multimasking, you can apply a clay mask to your T-zone to control oil and a hydrating gel mask to your cheeks to soothe dryness—getting the best of both worlds in one routine.
Why Multimasking Works
This approach works because it treats each part of your face with the care it actually needs. Instead of using one product that may not be suitable for every area, youre customizing your skincare for better results. Its also an efficient way to address several concerns in one go, saving time while giving your skin more attention.
Common Skin Concerns and Mask Types
| Face Area | Common Concern | Recommended Mask Type |
|---|---|---|
| T-Zone (Forehead, Nose, Chin) | Oiliness, Blackheads | Clay or Charcoal Mask |
| Cheeks | Dryness, Redness | Hydrating or Soothing Gel Mask |
| Under-Eye Area | Puffiness, Dark Circles | Caffeine-Infused Eye Patches or Cream Masks |
| Mouth Area | Sensitivity, Flakiness | Nourishing Cream Mask |
If youve ever felt like one mask isnt enough for all your skin concerns, multimasking could be the game-changer youre looking for. Its all about understanding what your skin needs—and giving each area exactly that.
2. The Benefits of Multimasking
Multimasking isnt just a skincare trend—it’s a smart, personalized way to treat your skin based on its unique needs. Instead of using one mask all over your face, multimasking lets you apply different masks to specific areas, giving each part of your skin exactly what it craves.
Personalized Skincare for Every Area
One of the biggest benefits of multimasking is that it allows for a customized routine. Most people—especially in the U.S.—deal with combination skin, where some areas are oily (like the T-zone) and others are dry or sensitive (like the cheeks). Using a single mask often means one area gets too much or too little of what it needs. With multimasking, you can target each zone:
| Face Area | Common Skin Concern | Recommended Mask Type |
|---|---|---|
| T-Zone (forehead, nose, chin) | Oiliness, enlarged pores | Clay or charcoal mask to absorb excess oil |
| Cheeks | Dryness, sensitivity | Hydrating or soothing gel mask |
| Under-eye area | Puffiness, fine lines | Cream-based or eye-specific masks with peptides or caffeine |
Improved Effectiveness with Targeted Treatment
By treating each area individually, your skincare becomes more effective. Youre not wasting product where its not needed, and youre giving high-need zones the attention they deserve. This targeted approach helps improve overall skin balance and can lead to faster results.
Better Use of Your Products
If you already have multiple face masks at home, multimasking is a great way to use them all more efficiently. Instead of waiting until one jar runs out before starting another, you can combine them in one session. This not only saves time but also gives you better value from your skincare products.
Why It Works for American Lifestyles
The fast-paced lifestyle in many parts of the U.S. makes multitasking a must—even in skincare. Multimasking fits right in by letting you treat multiple concerns in one go. Plus, it’s easy to do while catching up on your favorite Netflix show or scrolling through social media.

3. Finding the Right Masks for Your Skin Type
When it comes to multimasking, choosing the right mask for each area of your face is key to getting the best results. Since different parts of your face can have different needs—like an oily T-zone, dry cheeks, or acne-prone chin—it’s important to tailor your mask routine accordingly.
Understand Your Skin’s Needs
Before picking your masks, take a moment to identify what each area of your face needs. Heres a quick guide to help you figure it out:
| Face Area | Common Concerns | Recommended Mask Type |
|---|---|---|
| T-Zone (forehead, nose, chin) | Oily skin, blackheads, enlarged pores | Clay or charcoal masks to absorb oil and deep-clean pores |
| Cheeks | Dryness, flakiness, dullness from pollution | Hydrating masks with hyaluronic acid or aloe vera |
| Chin and Jawline | Breakouts, hormonal acne | Sulfur or salicylic acid-based masks to target acne |
| Under-eye Area | Puffiness, dark circles, fine lines | Gel or cream eye patches with caffeine or peptides (avoid strong actives) |
| Forehead and Nose Bridge | Sun damage, uneven tone | Brightening masks with vitamin C or niacinamide |
Popular Ingredients to Look For
If youre shopping for new masks, here are some popular ingredients that address common American skin concerns:
- Bentonite Clay: Great for oily and acne-prone areas like the T-zone.
- Aloe Vera: Soothes redness and hydrates dry spots on the cheeks.
- Vitamin C: Brightens dull skin affected by pollution or sun exposure.
- Caffeine: Reduces puffiness in the under-eye area.
- Salicylic Acid: Helps unclog pores and fight acne on the chin and jawline.
- Squalane: A lightweight hydrator that works well for dry or sensitive areas.
Create Your Custom Multimasking Routine
You don’t need fancy tools—just apply different types of masks where they’re needed. For example: use a clay mask on your forehead and nose, a hydrating mask on your cheeks, and an acne-fighting mask on your chin. Let each mask sit for the recommended time (usually 10–15 minutes), then rinse everything off together. It’s like giving each part of your face its own personalized treatment!
Pro Tip:
If youre short on time, look for multi-use mask kits designed specifically for multimasking—they often come with small amounts of several formulas so you can mix and match based on your skins needs that day.
This customized approach not only saves time but also helps you tackle multiple skin concerns in one go—perfect for busy lifestyles and ever-changing skin conditions.
4. How to Multimask: Step-by-Step Guide
Multimasking might sound fancy, but it’s actually super simple once you get the hang of it. The key is understanding your skin’s needs and applying different masks to specific areas of your face. Here’s a step-by-step guide to help you customize your routine like a pro.
Step 1: Prep Your Skin
Start with a clean face. Use a gentle cleanser to remove makeup, dirt, and excess oil. This helps the masks absorb better and work more effectively.
Optional Prep Tips:
- Use a warm towel or steam your face for a few minutes to open up pores.
- Gently exfoliate if your skin feels rough or flaky.
Step 2: Identify Your Skin Zones
Take a look at your face and note which areas have different concerns. For example:
| Area | Common Concern | Recommended Mask Type |
|---|---|---|
| T-Zone (forehead, nose, chin) | Oily, clogged pores | Clay or charcoal mask |
| Cheeks | Dryness or sensitivity | Hydrating or soothing mask |
| Under-eye area | Puffiness, dark circles | Eye-specific gel patches or cream mask (avoid regular masks here) |
Step 3: Apply the Masks
Use a clean brush or silicone spatula for precise application—this keeps things hygienic and helps you avoid overlapping products.
Application Tips:
- Apply each mask only where needed based on the concerns youve identified.
- Avoid layering different masks on top of each other.
- If using multiple wash-off masks with different timing, apply the one that takes longest first.
Step 4: Let Them Work Their Magic
Follow the instructions for each mask. Most should be left on for about 10–15 minutes, but always check the product label to avoid over-drying or irritation.
Pro Tip:
If one mask dries quicker than another, gently mist your face with water to keep everything balanced while you wait.
Step 5: Rinse Off Gently
Use lukewarm water and a soft washcloth to remove each mask without scrubbing. Be gentle—your skin just got pampered!
Step 6: Follow Up With Skincare
Your skin is now prepped to soak in even more goodness. Finish off your routine with:
- Toner: Helps balance pH and refresh skin.
- Serum (optional): Choose one based on your main skin goal—hydration, glow, etc.
- Moisturizer: Locks in moisture and keeps your skin barrier happy.
You can multimask once or twice a week depending on your skin type and lifestyle. Its an easy way to treat yourself—and your skin—to some well-deserved TLC!
5. Multimasking Tips and Mistakes to Avoid
Multimasking can work wonders for your skin when done right, but there are a few tricks to make the most of it—and some common slip-ups you’ll want to steer clear of. Whether youre new to multimasking or just want to fine-tune your routine, here are some helpful tips and things to avoid.
Smart Tips for a Better Multimasking Experience
Customizing your mask routine doesn’t have to be complicated. Here are some easy ways to upgrade your skincare game:
✅ Practical Tips
| Tip | Why It Matters |
|---|---|
| Use cooling masks in warm climates | Helps calm inflammation and feels refreshing during hot weather |
| Apply clay masks only on oily areas | Targets excess oil without drying out other parts of your face |
| Hydrating masks go on dry or tight zones | Keeps skin balanced and prevents over-drying from other active masks |
| Use a silicone brush or clean spatula for application | More hygienic than fingers and helps with even application |
| Set a timer for each area based on the mask type | Avoids leaving certain masks on too long and irritating your skin |
Mistakes to Avoid When Multimasking
Sometimes, less is more—especially when it comes to combining different skincare actives. Watch out for these common mistakes:
🚫 Common Mistakes
- Over-masking: Using too many masks at once can overwhelm your skin. Stick to no more than three targeted masks in one session.
- Layering incompatible ingredients: Don’t use multiple masks that contain strong actives like AHAs, BHAs, or retinol at the same time—they can cause irritation.
- Skipping patch tests: Always test new masks on a small area first, especially if you have sensitive skin.
- Not moisturizing afterward: Even if you used hydrating masks, always follow up with a moisturizer to lock in the benefits.
- Using hot water to rinse off: Hot water can strip your skin; instead, use lukewarm water and gently pat dry with a soft towel.
A Quick Checklist Before You Multimask
| Do This | Avoid This |
|---|---|
| Select masks based on specific skin zones (T-zone, cheeks, chin) | Applying the same mask all over without checking what each area needs |
| Follow instructions for each mask’s recommended time | Leaving all masks on until they dry out completely (can damage skin barrier) |
| Cleansing before masking and moisturizing after | Skipping prep or aftercare steps (this reduces results) |
The key to successful multimasking is knowing your skin and customizing thoughtfully. With the right mix of products and habits, you can give every part of your face exactly what it needs—without overdoing it.


