1. Prep Your Skin Like a Pro
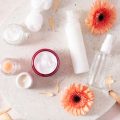
If you want your glam makeup to look flawless and last all day, prepping your skin is an absolute must. Even the best foundation can’t cover up rough patches or dry spots, so start with a clean canvas. First, wash your face with a gentle cleanser that suits your skin type—think foaming cleansers for oily skin or creamy formulas for dry skin. Don’t skip this step; leftover oil or dirt can cause makeup to slide off or look patchy.
Hydrate and Moisturize
After cleansing, it’s time to lock in moisture. Use a lightweight, non-greasy moisturizer if you have oily skin, or go for something richer if you’re on the drier side. Take a minute to gently massage it into your face and neck—this not only hydrates but also boosts circulation for a healthy glow. In the U.S., many people swear by moisturizers with SPF for daily use to protect against sun damage, even if you’ll be indoors most of the day.
Prime Time: The Secret Weapon
The real game-changer? Primer. A good primer smooths out pores and fine lines while helping your makeup grip better and stay put longer. Pick a formula that fits your needs: mattifying primers are awesome for controlling shine, while hydrating primers give dry skin an extra boost. Squeeze a pea-sized amount onto your fingertips and apply evenly across your face—don’t forget spots like your T-zone, which tend to get oily faster.
Pro Tips for Rookies
If you’re new to makeup, keep it simple. Stick with products labeled “for sensitive skin” or “non-comedogenic” to avoid breakouts or irritation. And remember—less is more! Overdoing skincare before makeup can cause pilling (those annoying little flakes), so use just enough product to do the job.
Quick Recap:
Cleansing removes impurities, moisturizing keeps your skin soft and supple, and primer creates the perfect base for an easy glam look that lasts from brunch to date night. With these steps, even beginners can nail their skin prep like a true pro.
2. Build a Flawless Base
Creating a flawless base is the foundation of any glam makeup look, especially for beginners looking to achieve that effortless yet elevated style. Before reaching for your favorite products, make sure your skin is prepped: cleanse, moisturize, and apply a lightweight primer suited for your skin type. This routine will help your makeup last longer and look smoother.
Foundation Application Techniques
Choose a foundation that matches your undertone and offers buildable coverage. For rookies, liquid or cream foundations are easiest to blend. Use a damp beauty sponge or a flat-top brush to buff the product into your skin in gentle, tapping motions—start from the center of your face and work outward for an even finish. Remember, less is more; you can always add another layer if you need extra coverage.
Concealer for Brightening and Coverage
Concealer is your best friend for hiding dark circles, blemishes, or redness. Pick a concealer one shade lighter than your foundation for under-eye brightening, and one that matches exactly for spot correction. Apply small dots where needed and use your ring finger or a mini sponge to blend seamlessly into the skin.
Setting Powder: Lock It All In
Setting powder keeps everything in place while controlling shine, which is key for that glam look without looking cakey. Translucent powders work well on most skin tones and prevent flashback in photos. Focus on oil-prone areas like the T-zone (forehead, nose, chin) and lightly dust over the rest of your face using a fluffy brush.
Quick Reference Table: Base Makeup Products & Tools
| Step | Product Type | Recommended Tool |
|---|---|---|
| Foundation | Liquid/Cream | Damp Sponge or Flat-Top Brush |
| Concealer | Cream/Liquid Stick | Mini Sponge or Fingertip |
| Setting Powder | Translucent/Pressed | Fluffy Powder Brush |
By following these beginner-friendly steps and using the right tools, you’ll achieve a natural yet glamorous canvas that sets the stage for the rest of your simple glam look. Take it slow, blend well, and remember: confidence is the ultimate finishing touch!

3. Easy Eye Makeup That Pops
Step-by-Step Guide for Effortless Eyeshadow Blending
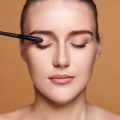
Start by prepping your eyelids with a lightweight eye primer or even a dab of concealer. This helps your eyeshadow stay put all day and makes colors look more vibrant. Choose a neutral eyeshadow palette—think soft browns, taupes, or champagnes—that’s beginner-friendly. Using a fluffy blending brush, sweep a light shade all over your lid as the base. Next, pick a slightly deeper shade and blend it into your crease using windshield wiper motions. Don’t overthink it: focus on building up color slowly. For a little extra glam, tap a shimmery shade onto the center of your lids with your fingertip or a small flat brush.
Eyeliner Tricks for Makeup Rookies
If you’re new to eyeliner, try starting with a brown pencil for a softer, more forgiving look than black liquid liner. Gently line along your upper lash line in short strokes—don’t worry about making it perfect; you can smudge out any mistakes with a cotton swab or a smudger brush for that trendy, lived-in effect. If you want to add subtle drama, flick the end upward slightly for an easy mini-wing.
Mastering Mascara Application
Finish off your eye look with mascara—a must for opening up your eyes and giving instant definition. Start at the base of your lashes and wiggle the wand upward in a zigzag motion to separate and coat each lash evenly. For extra volume, apply two coats but let the first one dry for about 30 seconds before adding the second. Don’t forget your lower lashes—a light touch here adds balance without clumping.
Pro Tip:
If you make any mistakes or smudges, wait until they dry completely before gently flicking them away with a clean spoolie or Q-tip—no need to panic or start over!
4. Shape and Define Your Brows
Your brows are the unsung heroes of any glam look—they frame your face and instantly elevate your vibe. For makeup rookies, mastering brow techniques can feel intimidating, but with a few strategic moves, you’ll achieve that polished, effortless finish. Here’s how to get brows on point, even if you’re just starting out.
Choose the Right Brow Product
| Product Type | Best For | Pro Tips |
|---|---|---|
| Pencil | Filling sparse areas with precision | Pick a shade close to your natural brow color for a natural effect |
| Powder | A soft, diffused look | Apply with an angled brush for better control and blendability |
| Brow Gel (Tinted/Clear) | Setting hairs in place and adding volume | Brush upward and outward for a fuller appearance; clear gel works for all shades |
Step-by-Step: Fill, Shape & Set
- Map Your Brows: Use your pencil or brush to mark three key points—the start (aligned with the side of your nose), the arch (diagonally from your nostril through your pupil), and the tail (ends at an angle from your nostril to the outer corner of your eye).
- Fill In Sparse Areas: With light, hair-like strokes, fill in gaps. Don’t overdraw—keep it real for that “born this way” effect.
- Shape & Define: Focus on the bottom edge for definition. Blend with a spoolie brush to soften harsh lines.
- Set It: Sweep on brow gel to lock everything in place. For extra lift, brush hairs slightly upward at the front.
Expert Hacks for American Glam Brows
- Keep It Balanced: Remember, your brows are sisters—not twins! Don’t stress minor differences.
- Avoid Over-Plucking: Full brows are in. Tweeze only stray hairs below your natural shape.
- Lighter Touch Up Front: For that modern gradient effect seen on TikTok and Instagram, use less product at the inner corners.
- Crisp Finish: Clean up edges with a touch of concealer under the brow arch for that sharp, glam look.
Brow Mistakes to Avoid
- Going Too Dark: Always choose a shade that matches or is one shade lighter than your natural hair color for a softer result.
- Heavy Handed Application: Build up slowly—you can always add more if needed!
- Neglecting Setting Gel: Especially important if you have unruly or coarse brow hairs. This keeps them looking neat all day long.
Nailing your brows is one of the easiest ways to upgrade your whole makeup look. With these rookie-friendly tips, you’ll be ready to rock bold, beautiful brows that perfectly frame your face—no pro experience required!
5. Add Dimension with Contour and Highlight
To really elevate your simple glam look, adding subtle contour and highlight is a game-changer—even for total makeup rookies. The key is to keep it natural and easy. Start by choosing a matte bronzer or a contour stick thats just one or two shades darker than your skin tone. Using a fluffy brush or your fingertips, lightly sweep the product under your cheekbones, along your jawline, and at your temples. For a quick tip, make a soft “3” shape on each side of your face for seamless blending—think forehead, cheekbone, then jaw.
Quick Contouring Technique
Don’t overthink it! Apply the product where shadows naturally fall on your face. Blend in circular motions for a soft-focus effect—no harsh lines allowed. If you want extra definition, use a smaller brush around the sides of your nose, but go easy so it still looks natural.
Highlight for That Radiant Finish
To add glow, grab a cream or powder highlighter that’s close to your undertone (champagne or gold works great for most). Dab it on the tops of your cheekbones, down the bridge of your nose, and just above your cupid’s bow. For an American-inspired touch, pop a little highlight in the inner corners of your eyes and right under the brow bone—it instantly brightens up your whole look.
Pro Tip for Makeup Rookies
If you’re worried about overdoing it, remember: less is more! Build up product slowly, and blend with a clean sponge or brush. This ensures everything looks seamless and camera-ready without any streaks or patches. Practice these quick methods every time you do your makeup and you’ll master that sculpted-yet-natural glam in no time.
6. Perfect Lips to Complete the Look
When it comes to nailing a simple glam look, your lips are the finishing touch that can make or break the entire vibe. For makeup rookies aiming for that polished, all-American aesthetic, choosing the right lip color and application technique is key to pulling everything together without looking overdone.
Choosing the Right Lip Color
For everyday American styles, go for shades that enhance your natural beauty—think soft pinks, peachy nudes, mauves, or classic rose. If you want a bolder touch but still keep it wearable, try a muted berry or a universally flattering red with blue undertones. Always consider your skin’s undertone: warm tones pop with corals and warm nudes, while cool undertones shine with pinks and rosy hues.
Application Tips for Rookies
- Prep First: Exfoliate your lips gently with a lip scrub or damp washcloth. Follow up with a hydrating balm to smooth out any dryness.
- Lip Liner Is Your Friend: Use a liner close to your chosen shade to define your lips and prevent feathering. Outline just slightly outside your natural lip line for a fuller look.
- Layer for Lasting Power: Apply your lipstick or gloss in thin layers. Blot lightly between coats for longer wear. For a subtle glam, use a satin or creamy formula; for extra polish, dab a bit of gloss on the center of your lips.
Keeping It Balanced
If you went bold on the eyes, stick with neutral lips. If you kept the eyes simple, feel free to experiment with richer colors. The key is balance—so nothing competes for attention and your whole look feels harmonious and fresh. With these steps, even makeup beginners can finish their glam looks confidently and blend right in with effortless American style.