1. Why Go DIY? The Benefits of Natural Hair Styling Products
If youve ever scanned the label on your favorite drugstore hair gel or styling cream, you mightve noticed a long list of ingredients that are hard to pronounce. That’s one of the many reasons why more and more people in the U.S. are turning to DIY hair styling products made with natural, recognizable ingredients. Let’s explore why making your own hair products at home is catching on—and why it might be worth trying for yourself.
Healthier Ingredients for Healthier Hair
One of the biggest perks of going DIY is knowing exactly what youre putting on your scalp and strands. Many commercial styling products contain synthetic fragrances, preservatives, and alcohols that can dry out or irritate your skin. On the flip side, homemade options often use nourishing oils, plant-based butters, and essential oils that not only style but also treat your hair.
Common Harmful Ingredients in Store-Bought Products vs. Natural Alternatives
| Drugstore Product Ingredient | Potential Issue | Natural DIY Alternative |
|---|---|---|
| Sulfates (e.g., SLS) | Strips natural oils | Coconut milk or aloe vera gel |
| Parabens | Hormone disruption concerns | Vitamin E oil or grapefruit seed extract |
| Artificial Fragrance | Allergic reactions, headaches | Essential oils like lavender or peppermint |
Eco-Friendly and Low Waste
Homemade hair products are also a win for the planet. Store-bought items often come in single-use plastic packaging that ends up in landfills. When you DIY, you can reuse jars and containers, cut down on waste, and even source sustainable ingredients locally.
Saves You Money Over Time
While buying all-natural ingredients upfront may seem pricey, they go a long way—many can be used across multiple DIY recipes for skin and body care too. Plus, you’ll likely spend less than you would buying high-end “clean beauty” brands from the store.
Example: Cost Comparison for Hair Gel (Approximate)
| Product Type | Average Cost per 4 oz |
|---|---|
| Drugstore Hair Gel (Name Brand) | $6 – $10 |
| DIY Flaxseed Gel (Homemade) | $1 – $2 (based on bulk flaxseeds) |
You Can Customize Everything
No two heads of hair are alike—and that’s where DIY shines. You get to control texture, hold strength, scent, and even color based on your unique needs. Whether you want a light spray for beachy waves or a strong pomade for sleek styles, theres a recipe for that.
A Fun Way to Take Control of Your Routine
Creating your own hair products is more than just practical—it can be a fun hobby! Many people find joy in experimenting with different ingredients and perfecting their own formulas. It’s self-care that feels creative and empowering.
Ditching store-bought products doesn’t mean sacrificing style—it means gaining control over what goes into your beauty routine while saving money and helping the environment along the way.
2. Common Ingredients Found in Natural Hair Styling Recipes
When it comes to making your own hair styling products at home, natural ingredients not only help you avoid harsh chemicals but also provide real nourishment for your hair. Here are some of the most popular ingredients found in DIY hair styling recipes and how they benefit different hair types.
Aloe Vera
Aloe vera is a go-to ingredient for many homemade hair products. It’s packed with vitamins A, C, and E, which support healthy cell growth and shiny hair. Its gel-like consistency makes it perfect for holding hairstyles without making your hair feel stiff or crunchy. Aloe vera is especially great for soothing dry scalps and adding lightweight moisture to fine or curly hair.
Benefits of Aloe Vera:
- Light hold for styling
- Reduces frizz and flyaways
- Soothes dry or irritated scalp
- Adds shine without heaviness
Coconut Oil
Coconut oil is a favorite in the natural beauty world because its super moisturizing and full of fatty acids that help strengthen the hair shaft. It works well as a base in DIY pomades, creams, and even gels. While it’s best for thick or curly hair types, people with fine hair should use it sparingly to avoid buildup.
Benefits of Coconut Oil:
- Deep conditioning properties
- Tames frizz and adds shine
- Helps prevent breakage
- Nourishes the scalp
Shea Butter
This rich, buttery ingredient is perfect for sealing moisture into dry or damaged hair. Shea butter is often used in DIY styling creams, especially for textured or coily hair types. Its loaded with vitamins A and E, which promote healthy hair growth and protect against environmental damage.
Benefits of Shea Butter:
- Excellent for twist-outs or braid-outs
- Adds weight and definition to curls
- Makes hair feel soft and smooth
- Protects from heat and sun exposure
Quick Ingredient Comparison
| Ingredient | Main Benefits | Best For Hair Types |
|---|---|---|
| Aloe Vera | Light hold, hydration, scalp soothing | Straight to curly, fine to medium textures |
| Coconut Oil | Nourishment, shine, frizz control | Thick, coarse, curly or dry hair |
| Shea Butter | Moisture sealing, curl definition, protection | Coily, kinky, dry or damaged hair |
The beauty of these ingredients lies in their versatility—you can mix and match them based on your hair’s needs. Whether youre looking to define curls, add shine, or simply reduce frizz naturally, theres a DIY combo that will work for you.
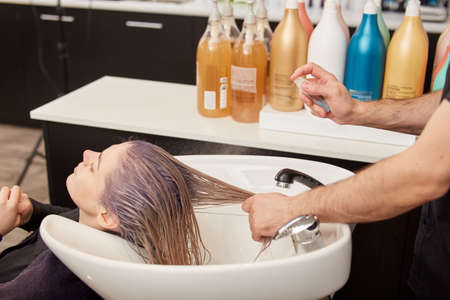
![]()
3. DIY Hair Gels, Mousses, and Pomades
Styling products like gels, mousses, and pomades are everyday must-haves for many of us—but commercial versions often come packed with alcohols, synthetic fragrances, and preservatives that can dry out your hair or irritate your scalp. Luckily, you can create effective natural alternatives at home with just a few kitchen-friendly ingredients. Here are some easy recipes to help you style your hair the natural way.
DIY Flaxseed Hair Gel
This gel is perfect for curly or wavy hair types that need definition without crunch.
Ingredients:
- 1/4 cup whole flaxseeds
- 2 cups water
- Optional: a few drops of lavender or rosemary essential oil (for scent and scalp benefits)
Instructions:
- Combine flaxseeds and water in a saucepan and bring to a boil.
- Reduce heat and simmer for 10 minutes, stirring occasionally until it thickens into a gel-like consistency.
- Strain through a cheesecloth while hot to separate the seeds from the gel.
- Add essential oils if desired, let cool, then store in the fridge for up to two weeks.
DIY Whipped Mousse for Volume
This mousse gives light hold and volume—great for fine or limp hair.
Ingredients:
- 1/4 cup aloe vera gel (pure)
- 1 tablespoon shea butter
- 1 teaspoon vegetable glycerin
- Optional: a few drops of peppermint essential oil (for scalp stimulation)
Instructions:
- Melt shea butter using a double boiler.
- Once melted, mix with aloe vera gel and glycerin in a bowl.
- Add essential oil if using.
- Whip with an electric mixer until fluffy (about 3-5 minutes).
- Store in an airtight container in a cool place.
Nourishing DIY Pomade
This pomade offers control and shine without leaving your hair greasy. It works well on short styles or flyaways.
Ingredients:
- 2 tablespoons beeswax pellets
- 2 tablespoons coconut oil
- 1 tablespoon jojoba oil
- Optional: a few drops of cedarwood or tea tree essential oil (helps with scalp health)
Instructions:
- Melt beeswax and coconut oil together using a double boiler.
- Add jojoba oil and stir well until fully combined.
- Add essential oils if desired.
- Pour into a small tin or jar and let cool until solidified.
Quick Comparison Table
| Product Type | Main Ingredients | Shelf Life | Best For |
|---|---|---|---|
| Hair Gel | Flaxseeds, Water, Essential Oils | Up to 2 weeks (refrigerated) | Curls & Waves Definition |
| Mousse | Aloe Vera Gel, Shea Butter, Glycerin | 2-3 weeks (cool place) | Volume & Light Hold |
| Pomade | Beeswax, Coconut Oil, Jojoba Oil | Up to 6 months (room temp) | Slick Styles & Flyaway Control |
You don’t need to sacrifice performance when going natural. These simple recipes give you the styling power you want—without the questionable ingredients found in many drugstore brands. Best of all? You probably already have most of these ingredients at home!
4. How to Customize DIY Products for Your Hair Type
One of the best things about making your own hair styling products is the ability to tailor them to your unique hair type. Whether your hair is curly, straight, fine, or textured, customizing ingredients and their ratios can make all the difference in achieving salon-worthy results right at home.
Understanding Your Hair Type
Before you start mixing up your DIY concoctions, its important to understand what your hair needs. Each hair type has different characteristics and requires specific ingredients for best results.
Hair Type Guide
| Hair Type | Key Characteristics | Main Needs |
|---|---|---|
| Curly | Dry, prone to frizz, defined curls | Moisture, curl definition, frizz control |
| Straight | Smooth, tends to get oily quickly | Lightweight hold, volume boost |
| Fine | Delicate strands, low volume | Light texture, root lift without heaviness |
| Textured/Coily | Tightly coiled or zig-zag pattern, very dry | Intense moisture, softening agents, strong hold |
Choosing the Right Ingredients
Your ingredient list should reflect what your hair craves. Heres a quick guide on what works best for each type:
Ingredient Recommendations by Hair Type
| Hair Type | Best Oils/Butters | Recommended Styling Add-ins |
|---|---|---|
| Curly | Coconut oil, shea butter | Aloe vera gel, flaxseed gel for curl definition |
| Straight | Jojoba oil (lightweight) | Cornstarch or arrowroot powder for oil control and volume |
| Fine | Grapeseed oil (very light) | Sea salt spray for texture and lift without weight |
| Textured/Coily | Castor oil, mango butter | Aloe vera gel, honey for moisture retention and shine |
Adjusting Ingredient Ratios for Best Results
The ratio of ingredients you use can greatly affect how well your product performs. Heres a basic guideline:
If You Have Curly Hair:
Use higher ratios of oils and butters (up to 60%) with humectants like aloe vera or honey (20-30%) to lock in moisture and define curls.
If You Have Straight Hair:
Keep oils light (10-15%) and focus more on volumizing agents like cornstarch or sea salt (25-35%). Use a water base to avoid buildup.
If You Have Fine Hair:
Avoid heavy oils altogether or keep them under 10%. Use water-based ingredients and add lightweight texturizers like sea salt or rice water.
If You Have Textured or Coily Hair:
You’ll benefit from rich butters (40-50%) combined with thick moisturizers like aloe vera gel or flaxseed gel (30%). These help nourish and maintain structure.
Pro Tips for Success:
- Patch Test First: Always do a small patch test before applying a new product all over your scalp or hair.
- Tweak Gradually: Start with small batches so you can adjust ratios easily if needed.
- Add Essential Oils Wisely: Choose essential oils based on both scent and benefits—like tea tree oil for scalp health or lavender oil for soothing effects.
No matter your hair type, DIY lets you be in control. With the right base ingredients and adjustments tailored to your hair’s needs, you’ll be able to create custom styling products that rival anything youd find on store shelves—naturally!
5. Storage Tips and Shelf Life for Homemade Hair Products
Making your own DIY hair styling products is a fun and healthy way to care for your hair, but its important to store them properly to keep them fresh and safe to use. Unlike store-bought products loaded with synthetic preservatives, homemade options rely on natural ingredients, which can spoil if not handled correctly. Heres how to keep your creations in top shape.
Keep It Cool
Many natural ingredients—like aloe vera gel, coconut milk, or flaxseed—can go bad quickly if left at room temperature. For best results, store your homemade hair products in the refrigerator. This not only extends their shelf life but also helps maintain their texture and effectiveness.
Refrigeration Guidelines:
| Product Type | Recommended Storage | Shelf Life |
|---|---|---|
| Flaxseed Gel | Refrigerator | 1 to 2 weeks |
| Aloe Vera Hair Spray | Refrigerator | 2 to 3 weeks |
| Coconut Milk Leave-in Conditioner | Refrigerator | Up to 1 week |
| Sugar-Based Hair Gel with Essential Oils | Airtight jar in cool place or fridge | 2 to 3 weeks (fridge extends life) |
| Shea Butter Styling Cream (no water content) | Cool, dry place away from sunlight | Up to 6 months |
Add Natural Preservatives
If you want your DIY styling products to last longer without refrigeration, consider using natural preservatives. These wont make your product last forever, but they can help reduce bacterial growth and extend freshness.
Naturally Preserving Ingredients:
- Vitamin E Oil: Helps slow down oxidation of oils.
- Essential Oils (like tea tree, lavender, rosemary): Offer mild antimicrobial properties.
- Citric Acid: Balances pH and reduces microbial growth.
- Aloe Vera with Preservative: Use store-bought stabilized aloe vera gel instead of fresh for longer shelf life.
- Natural Extracts (like grapefruit seed extract): Can help inhibit mold and bacteria.
Avoid Contamination
The way you use and handle your DIY hair products matters too. Always use clean hands or tools when scooping out product to avoid introducing bacteria. Store them in airtight containers—preferably glass or BPA-free plastic—and label each container with the date it was made so you can track freshness easily.
A Quick Checklist:
- Date every batch so you know when it’s time to toss it out.
- Avoid dipping fingers into jars—use a clean spatula or spoon instead.
- If a product changes color, smells funky, or develops mold—throw it away immediately.
- If unsure about shelf life, make smaller batches more often for maximum safety and freshness.
Treat your homemade hair goodies like fresh food: keep them cool, clean, and clearly labeled. With just a little care, your DIY hair styling products will stay safe, effective, and ready for use whenever you need them!