1. Understanding Your Skin Type
Before diving into foundation and concealer techniques, it’s super important to understand your skin type. Knowing whether you have oily, dry, combination, or sensitive skin will help you choose the right products that work with—not against—your skin. Using the wrong formula can lead to patchiness, breakouts, or makeup that just doesn’t last.
Why Skin Type Matters
Your skin type directly affects how makeup sits on your face. For example, if you have oily skin and use a heavy cream foundation, it might slide off by midday. On the other hand, using a matte formula on dry skin can make flakiness more noticeable. That’s why understanding your skin type is step one in creating a flawless base that looks natural and lasts all day.
How to Identify Your Skin Type
You don’t need fancy tools to figure this out—just observe how your skin behaves throughout the day. Here’s a quick breakdown:
| Skin Type | Characteristics |
|---|---|
| Oily | Shiny appearance, especially in the T-zone (forehead, nose, chin); larger pores; prone to acne and blackheads. |
| Dry | Tight feeling; rough texture; flaky patches; makeup may cling or crack. |
| Combination | Oily in some areas (usually T-zone) and dry or normal in others; uneven texture. |
| Sensitive | Easily irritated; redness or burning after product use; may react to fragrances or harsh ingredients. |
Quick At-Home Test
Wash your face with a gentle cleanser and wait about an hour without applying any products. Then check your skin:
- If its shiny all over—you likely have oily skin.
- If it feels tight or looks flaky—you probably have dry skin.
- If it’s oily in some spots and dry in others—you have combination skin.
- If it feels irritated or red—you may have sensitive skin.
Pro Tip:
Your skin type can change with the seasons, hormones, or lifestyle habits. Its smart to reassess every few months to keep up with what your skin needs.
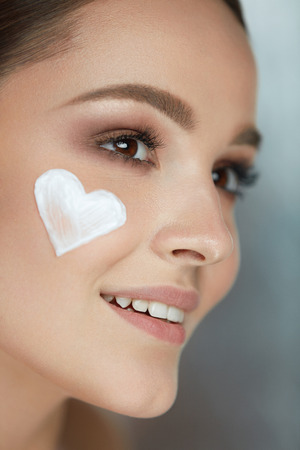
2. Prepping Your Skin for Makeup
Creating a flawless makeup base starts with proper skin prep. No matter your skin type, taking the time to cleanse, moisturize, and prime can make all the difference in how your foundation and concealer apply and wear throughout the day. Heres how to get your skin ready like a pro:
Cleansing: Start Fresh
Always begin with clean skin. Use a gentle cleanser that suits your skin type to remove dirt, oil, and any leftover products from earlier in the day. This helps prevent clogged pores and ensures that your makeup goes on smoothly.
Recommended Cleansers by Skin Type:
| Skin Type | Cleanser Type | Example Ingredients |
|---|---|---|
| Oily | Foaming or gel cleanser | Salicylic acid, tea tree oil |
| Dry | Cream or hydrating cleanser | Hyaluronic acid, glycerin |
| Sensitive | Fragrance-free gentle cleanser | Aloe vera, chamomile |
| Combination | Balancing gel or milk cleanser | Green tea, niacinamide |
Moisturizing: Lock In Hydration
Even if you have oily skin, moisturizing is essential. It helps balance your skin and creates a smooth canvas for makeup application. Choose a moisturizer based on your skins needs—lightweight gels for oily skin and rich creams for dry skin work best.
Tips:
- Apply moisturizer while your face is still slightly damp to lock in moisture.
- Give it a few minutes to absorb before moving on to primer.
Priming: The Final Step Before Makeup
A good primer helps blur imperfections, control oil, or add hydration depending on its formula. It also makes your foundation and concealer last longer and look more even throughout the day.
Primer Recommendations:
| Skin Concern | Primer Type | Main Benefit |
|---|---|---|
| Pores & Texture | Smoothing silicone-based primer | Blurs pores and fine lines |
| Redness or Sensitivity | Color-correcting green primer | Neutralizes redness gently |
| Dryness or Dullness | Hydrating luminous primer | Adds glow and hydrates dry areas |
| Oily Skin/Shine Control | Mattifying primer with oil-control properties | Keeps shine at bay all day long |
Your Base Starts Here!
A flawless base begins well before you apply foundation or concealer. When your skin is properly cleansed, moisturized, and primed, makeup glides on effortlessly and stays put longer—so don’t skip these crucial steps!
![]()
3. Choosing the Right Foundation Formula
Picking the right foundation formula can make all the difference in how your base looks and feels throughout the day. Whether you have dry, oily, combination, or sensitive skin, there’s a foundation type that fits your needs and complements your lifestyle. Let’s break down the most common types of foundations and how to choose the best one for you.
Types of Foundation
| Type | Best For | Finish | Coverage |
|---|---|---|---|
| Liquid Foundation | All skin types (formulas vary) | Dewy, natural, or matte | Light to full |
| Powder Foundation | Oily or combination skin | Matte | Light to medium |
| Cream Foundation | Dry or mature skin | Dewy or satin | Medium to full |
| Stick Foundation | Normal to combination skin; great for on-the-go | Satin or matte | Medium to full |
How to Choose Based on Skin Type
Dry Skin
If your skin tends to feel tight or flake, look for hydrating formulas with a dewy or satin finish. Cream or liquid foundations with added moisturizers can help keep your skin looking fresh and glowing.
Oily Skin
If you get shiny throughout the day, opt for oil-free formulas with a matte finish. Powder foundations or long-wear liquid formulas can help control shine without clogging pores.
Combination Skin
If you’re oily in some areas and dry in others, try a balancing liquid foundation or stick formula. You may also consider mixing two types — like using powder on the T-zone and cream on drier areas.
Sensitive Skin
If your skin gets irritated easily, choose fragrance-free and hypoallergenic formulas. Mineral-based powders and lightweight liquids are often gentle enough for sensitive complexions.
Selecting the Right Finish and Coverage
Your ideal finish depends not only on your skin type but also on personal preference and occasion. For everyday wear, a natural or satin finish is versatile and flattering. For events or photoshoots, you might go for a full-coverage matte look. Always consider your lifestyle — if youre active or constantly on-the-go, long-wear or transfer-resistant formulas may be best.
4. Concealer Techniques for a Seamless Look
Concealer is your secret weapon for achieving a flawless base. Whether youre looking to hide blemishes, cover dark circles, or neutralize redness, the right technique can make all the difference. The key is to enhance your skin’s natural beauty without making it look cakey or overdone.
Choosing the Right Concealer
Selecting the right concealer depends on what you’re trying to cover and your skin type. Here’s a quick guide to help you pick:
| Concern | Concealer Type | Recommended Formula |
|---|---|---|
| Dark Circles | Brightening Concealer | Creamy with peach or orange undertones |
| Blemishes | Full-Coverage Concealer | Matte finish, thicker consistency |
| Redness | Color-Correcting Concealer | Green-tinted formula to cancel out redness |
Application Tips for a Natural Finish
Under the Eyes
- Use a small amount of product—less is more under the eyes.
- Apply in an upside-down triangle shape to brighten and lift.
- Gently blend with a damp beauty sponge or ring finger using tapping motions.
- Set lightly with a finely-milled translucent powder to prevent creasing.
Blemishes and Breakouts
- Dab concealer directly onto the blemish with a clean brush or fingertip.
- Use a shade that matches your foundation exactly.
- Avoid blending too far outside the blemish area to maintain coverage.
- Set with powder using a small brush for long-lasting wear.
Redness and Discoloration
- If covering larger areas of redness (like around the nose), use a green color corrector first, followed by your regular concealer.
- Blend gently so it meshes well with your foundation underneath.
- You can also use a buildable medium-coverage concealer alone if redness is minimal.
Blending Like a Pro
The way you blend concealer makes all the difference. A damp makeup sponge gives the most natural finish, helping the product melt into your skin seamlessly. Use dabbing motions instead of dragging to maintain coverage while avoiding harsh lines.
Pro Tip:
If you’re layering foundation and concealer, always apply foundation first. This helps you use less concealer and keeps everything looking more natural.
With the right tools and techniques, concealer can be your best friend in creating a smooth, even complexion that still looks like real skin.
5. Blending and Setting Your Base
Getting that flawless, natural-looking base is all about how you blend and set your foundation and concealer. Whether youre using a brush, sponge, or your fingers, the key is to make everything look seamless—like your skin, but better. Heres how to do it right for all skin types.
Blending Tools: What Works Best for You?
Choosing the right tool can make a big difference in how your makeup looks and lasts. Heres a quick guide:
| Tool | Best For | Tips |
|---|---|---|
| Makeup Sponge (e.g., Beauty Blender) | Dewy finish, all skin types | Dampen before use for smooth blending and minimal product absorption |
| Foundation Brush (flat or buffing) | Full coverage, normal to dry skin | Use circular motions to avoid streaks and build coverage gradually |
| Fingers | Natural finish, dry or sensitive skin | Warm up product between fingertips and tap into skin for a skin-like finish |
The Art of Blending Foundation and Concealer
No matter what tool you choose, blending is all about patience and technique:
- Foundation: Start in the center of your face (cheeks, nose) and blend outward. This helps avoid buildup near the hairline or jawline.
- Concealer: Use a small brush or fingertip to gently tap the product under your eyes or on blemishes—don’t rub! Then blend the edges into your foundation.
Pro Tip:
If youre using both foundation and concealer, apply foundation first. This way you’ll need less concealer afterward.
Setting Your Base for All-Day Wear
This step locks everything in place and helps prevent creasing or shine throughout the day. Here’s how to set like a pro:
- Setting Powder: Use a translucent powder if you want a matte finish or have oily skin. Lightly press powder into areas prone to shine—usually the T-zone (forehead, nose, chin).
- Powder Puff vs. Brush: A puff gives more precise control and better oil absorption; a fluffy brush creates a softer look.
Mist It to Finish:
A setting spray not only melts all the layers together but also adds longevity. Hold it 8–10 inches away from your face and mist lightly in an “X” and “T” motion.
Your Go-To Setting Combo Based on Skin Type:
| Skin Type | Setting Powder Type | Mist Type |
|---|---|---|
| Oily | Mattifying powder | Oil-control setting spray |
| Dry | Luminous finishing powder | Dewy hydrating mist |
| Sensitive/Combination | Talc-free translucent powder | Aloe-based soothing mist |
Nailing the blending and setting process ensures that your base stays smooth, even-toned, and fresh all day long—whether youre heading to work, brunch with friends, or just running errands.