1. Prepping Your Skin for a Natural Finish
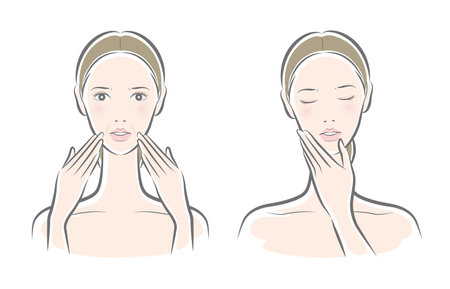
If you want that effortless, “I woke up like this” glow, it all starts with skincare. A no-makeup makeup look is all about enhancing your natural beauty—not covering it up. That means taking care of your skin is the first and most important step. Let’s break down what your skin needs before any makeup goes on.
Cleanse: Start Fresh
A clean face is a happy face. Use a gentle cleanser that suits your skin type to wash away dirt, oil, and leftover products from the night before. This gives you a fresh canvas and helps prevent clogged pores or patchy makeup.
Tip:
If you have dry or sensitive skin, avoid foaming cleansers—they can strip away natural oils. Try cream or gel-based options instead.
Moisturize: Keep It Hydrated
Even if your skin leans oily, don’t skip moisturizer! Hydration plumps the skin and smooths out fine lines, which helps your makeup blend better and last longer.
Choose the Right Moisturizer:
| Skin Type | Recommended Moisturizer |
|---|---|
| Dry | Cream-based with ingredients like hyaluronic acid or ceramides |
| Oily | Oil-free gel moisturizer or water-based formula |
| Sensitive | Fragrance-free and hypoallergenic formulas |
SPF: Protect Your Glow
Sunscreen isn’t just for beach days—it’s an everyday essential. UV damage can cause premature aging, uneven tone, and dark spots over time. For daily wear, go for a lightweight SPF 30 (or higher) that doesn’t leave a white cast.
Pro Tip:
If you’re short on time in the morning, try a moisturizer with built-in SPF to knock out two steps at once!
Your Pre-Makeup Skincare Routine in 3 Simple Steps:
| Step | What to Do |
|---|---|
| Cleansing | Wash your face with a gentle cleanser suited to your skin type. |
| Moisturizing | Apply a light layer of moisturizer to hydrate and prep your skin. |
| Sunscreen | Add SPF 30+ to protect from sun damage—even on cloudy days! |
Taking just five minutes to prep your skin can make a huge difference in how your no-makeup makeup turns out. Think of it as setting the stage—your skin should feel clean, soft, and protected before even thinking about picking up a foundation brush.
2. Choosing the Right Base Products
When it comes to mastering the no-makeup makeup look, your base products are everything. The goal is to enhance your natural skin, not cover it up. That means opting for lightweight formulas that even out your complexion without looking cakey or heavy.
Pick the Right Formula for Your Skin Type
Depending on your skin type, you’ll want to choose a base product that works with your skin’s needs while still giving you that fresh-faced finish.
| Skin Type | Recommended Product |
|---|---|
| Oily/Combination | Oil-free tinted moisturizer or matte BB cream |
| Dry | Hydrating foundation or dewy-finish BB cream |
| Normal | Tinted moisturizer or light liquid foundation |
| Sensitive | Fragrance-free BB cream with SPF |
Shade Matching Is Key
Your base should blend seamlessly into your skin. Test a few shades along your jawline in natural lighting to find the one that disappears into your skin tone. Avoid going too light or too dark—this can make the makeup more noticeable, which goes against the no-makeup vibe.
Less Is More
Instead of applying a full layer of foundation all over your face, try spot-applying where you need coverage—like around the nose, chin, or any redness. Use a damp beauty sponge or clean fingers to blend it in for a skin-like finish.
Top Picks for a No-Makeup Makeup Base
- Tinted Moisturizers: Great for hydration and sheer coverage (e.g., Laura Mercier Tinted Moisturizer)
- BB Creams: Offers skincare benefits + light coverage (e.g., Maybelline Dream Fresh BB Cream)
- Lightweight Foundations: Choose buildable formulas (e.g., NARS Pure Radiant Tinted Moisturizer)
Pro Tip:
If you have good skin days, skip foundation altogether and just use a concealer where needed. It keeps the look super natural and lets your real skin shine through.
3. Concealing Strategically
When it comes to achieving the no-makeup makeup look, less is definitely more—especially when using concealer. Instead of covering your entire face, focus on just the areas that truly need a little extra help. This keeps your skin looking natural and fresh, not heavy or cakey.
Where to Apply Concealer
Think of concealer as a spot treatment rather than a full-face product. Here are the key areas to target:
| Area | Why It Matters |
|---|---|
| Under the Eyes | Brightens dark circles and makes you look more awake. |
| Around the Nose | Covers redness or broken capillaries commonly found here. |
| Blemishes or Spots | Helps even out skin tone without masking your whole face. |
Tips for Natural-Looking Coverage
- Use a creamy, lightweight concealer: Choose a formula that blends easily into your skin without settling into fine lines.
- Dab, don’t rub: Use your fingertip or a small brush to gently tap the product into your skin for seamless blending.
- Blend with your foundation: If youre wearing tinted moisturizer or light foundation, make sure to blend the edges so there are no harsh lines.
- Set only where needed: A tiny bit of translucent powder can lock it in place—just avoid over-powdering to maintain that skin-like finish.
The goal is to enhance—not hide—your natural beauty. By applying concealer only where needed, you’ll keep your complexion looking clean, real, and effortlessly polished.
4. Soft Definition for Eyes and Brows
When it comes to the no-makeup makeup look, your eyes and brows should look effortlessly defined without being overdone. The key is to use soft, neutral tones and lightweight products that enhance your natural features without drawing too much attention.
Eyes: Keep It Light and Fresh
Skip heavy eyeliner or bold eyeshadow colors. Instead, reach for nude or taupe shades that add subtle depth to your lids. A light wash of matte or satin shadow in a shade just slightly darker than your skin tone can create a naturally contoured look.
Eye Makeup Tips
| Product | How to Use |
|---|---|
| Neutral Eyeshadow (Beige, Taupe) | Apply a light layer over the lid for dimension |
| Mascara (Brown or Black-Brown) | Use one coat on upper lashes only to open up the eyes |
| Eyelash Curler | Curl lashes before mascara for a lifted look |
Brows: Natural but Defined
Brows frame your face, so giving them a bit of shape and fullness helps complete the no-makeup look. Use a brow gel or a fine-tipped pencil in a shade close to your natural hair color. Avoid harsh lines—think feathery strokes that mimic real hair.
Brow Grooming Essentials
| Product | Purpose |
|---|---|
| Tinted Brow Gel | Adds color and holds hairs in place for a fuller look |
| Brow Pencil (Fine Tip) | Fills sparse areas with hair-like strokes |
| Spoolie Brush | Blends product and fluffs brows for a natural finish |
The goal is to gently enhance your eyes and brows so they stand out in a subtle way. With just a few carefully chosen products, you can achieve a soft yet polished appearance perfect for everyday wear.
5. Adding a Touch of Color with Cream Products
To keep your no-makeup makeup look fresh and natural, using cream products is key. They melt into the skin better than powders and help maintain that dewy, skin-like finish. Let’s break down how to use cream blush, bronzer, and highlighter for a soft touch of color and dimension.
Why Choose Cream Products?
Cream formulas are ideal for everyday wear because they blend easily and give you control over how much product you apply. They also work beautifully with minimal foundation or tinted moisturizer, which is perfect for the no-makeup makeup vibe.
How to Apply Cream Blush, Bronzer & Highlighter
| Product | Where to Apply | Application Tip |
|---|---|---|
| Cream Blush | Apples of the cheeks, blending upward toward temples | Use fingers or a damp sponge to tap in color for a seamless finish |
| Cream Bronzer | Hollows of the cheeks, hairline, jawline | Apply lightly with a brush or fingertips and blend well into the skin |
| Cream Highlighter | High points of face—cheekbones, brow bone, bridge of nose | Dab gently for a subtle glow without any shimmer overload |
Pro Tip: Blend Everything In
The secret to making cream products look natural is blending. Whether you use your fingers, a sponge, or a brush, make sure there are no harsh lines. The goal is to enhance your features while keeping the overall look soft and effortless.
Look for Skin-Like Finishes
When shopping for cream products, choose ones labeled “dewy,” “natural finish,” or “skin-like.” Avoid overly shimmery or matte options—they can take away from the barely-there aesthetic.
Quick Reminder:
- Less is more—build up slowly if needed.
- Cream products work best over liquid or cream base makeup.
- If you have oily skin, set lightly with translucent powder only where necessary.
6. Setting Your Look for All-Day Wear
Once youve created your perfect no-makeup makeup look, its time to make sure it lasts all day—without losing that fresh, dewy finish. The key is to use the right setting products that lock everything in place while still letting your natural skin shine through.
Why Setting Matters
No-makeup makeup is all about looking effortlessly flawless, but without setting your look properly, even the most minimal products can fade, crease, or slide off throughout the day. A good setting routine helps control shine in the right areas and keeps your makeup from transferring or breaking down.
Choose the Right Setting Product
Depending on your skin type and personal preference, you can go with a setting spray or a light powder—or both! Heres a quick comparison to help you decide:
| Setting Product | Best For | Finish | How to Apply |
|---|---|---|---|
| Setting Spray | Normal to dry skin | Dewy, natural finish | Mist evenly over face after makeup application |
| Translucent Powder (lightweight) | Oily or combination skin | Soft matte finish | Use a fluffy brush to lightly dust over T-zone or where needed |
| Combination (Spray + Powder) | Long wear in any climate | Balanced finish | Powder first in oily areas, then mist with spray for a skin-like glow |
Pro Tip:
If youre using powder, make sure its finely milled and translucent so it doesnt add coverage or dull down your natural glow. Look for formulas labeled “blurring” or “light-reflecting” for the most seamless finish.
Where to Set Your Makeup (and Where Not To)
The goal here isn’t to mattify your whole face—it’s about strategic setting. Focus on areas where makeup tends to crease or fade, like:
- T-zone (forehead, nose, chin)
- Under the eyes (to prevent concealer creasing)
- Sides of the nose and around the mouth
Avoid setting the high points of your face—like cheekbones and brow bones—if you want to keep that natural glow popping.
Quick Application Guide:
- Spray: Hold about 8–10 inches away from your face and mist in an “X” and “T” motion.
- Powder: Use a small amount on a fluffy brush; tap off excess before applying.
A little goes a long way when youre aiming for that barely-there beauty vibe. With the right setting technique, your no-makeup makeup look will stay fresh and natural-looking from morning coffee to evening errands.