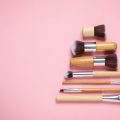
1. Introduction to Makeup Sponges
Makeup sponges have become a must-have in just about every beauty lover’s kit — and for good reason. These soft, squishy tools help you achieve that flawless, airbrushed look with minimal effort. Whether youre a beginner or a seasoned makeup pro, understanding what makeup sponges are and how they compare to other tools like brushes or fingers can totally change your routine.
What Are Makeup Sponges?
Makeup sponges are soft applicator tools made of materials like latex-free foam or hydrophilic polyurethane. They’re designed to blend liquid, cream, and even powder products smoothly into the skin for a seamless finish. You’ll often see them shaped like teardrops, flat-edged ovals, or mini versions for detail work.
Why Are They So Popular?
Sponges are known for their ability to press product into the skin without streaks. When dampened slightly, they expand and absorb less product, giving you a more natural, dewy finish while wasting less makeup. Plus, they’re super easy to use — just dab and bounce!
Makeup Sponge vs. Brush vs. Fingers
If you’ve ever wondered whether a sponge is really better than your trusty foundation brush or even your fingertips, here’s a quick comparison:
| Tool | Pros | Cons |
|---|---|---|
| Makeup Sponge | Blends seamlessly Great for natural finishes Works well with liquids & creams |
Needs regular cleaning Can absorb product if not damp |
| Brush | Precise application Less product absorption Easy to layer coverage |
Can leave streaks May require more blending time |
| Fingers | Quick & convenient Warms up product for smooth blending No tools needed |
Less hygienic Harder to get an even finish Not ideal for all textures |
When Should You Use a Sponge?
A sponge is perfect when you want that skin-like finish — think BB cream, foundation, concealer, or cream blushes. It’s also great for pressing setting powder under the eyes or around the nose for a smooth look.
The Bottom Line on Sponges (So Far!)
If youre aiming for a natural, blended finish and easy application, makeup sponges can be a game-changer in your beauty routine. In the next section, we’ll break down the different types of sponges available and how to choose the right one based on your needs.
2. Different Types of Makeup Sponges
When it comes to makeup application, not all sponges are created equal. There are several types of makeup sponges on the market, each designed for a specific purpose. Choosing the right one can make a big difference in how your foundation, concealer, or other products blend into your skin. Let’s break down the most common types of makeup sponges and what they’re best used for.
Classic Teardrop Sponge
This is the most recognizable type of makeup sponge. It has a rounded bottom and a pointed tip, making it super versatile.
- Rounded base: Great for blending foundation on larger areas like cheeks and forehead.
- Pointed tip: Perfect for reaching smaller areas like under the eyes and around the nose.
Flat-Edge Sponge
This sponge features one flat side along with a rounded bottom and a tapered end. It’s ideal if you want more control during application.
- Flat edge: Helps with contouring and baking (setting powder under eyes or cheekbones).
- Rounded side: Good for overall blending.
- Tapered point: Works well for targeted areas.
Silicone Sponge
A newer addition to the beauty world, silicone sponges don’t absorb any product, which means less waste. However, they do have limitations.
- No absorption: Ideal for applying liquid products like foundation or BB cream without losing product.
- Smooth surface: Not great for blending; better for spreading product evenly before using another tool to blend.
Wedge Sponge
The old-school favorite! Wedge-shaped sponges are often disposable and come in multi-packs. They’re still a go-to for many makeup artists.
- Flat edges: Allow precision around eyes and nose.
- Corners: Great for touch-ups and spot concealing.
- Budget-friendly: Easy to replace often to keep things hygienic.
Quick Comparison Table
| Sponge Type | Main Features | Best For |
|---|---|---|
| Teardrop | Rounded base & pointed tip | All-over blending & detail work |
| Flat-Edge | Flat edge + round & tapered sides | Baking, contouring, precise blending |
| Silicone | No absorption, smooth surface | Product application without waste |
| Wedge | Flat edges & corners, disposable | Touch-ups, precision work, travel-friendly use |
Selecting the right sponge depends on your personal routine and what kind of finish you’re going for. Whether you prefer full coverage or a light natural look, there’s a sponge designed to help you get there with ease.

3. How to Use Each Type of Sponge
Makeup sponges are more than just cute tools on your vanity — each type is designed to help you achieve a flawless finish in different ways. Whether youre applying foundation, blending out concealer, baking under the eyes, or sculpting with contour, using the right sponge and technique makes all the difference.
Understanding the Techniques
Before diving into how to use each sponge, lets go over some common techniques:
- Apply: Use tapping or stippling motions to press product into the skin for an even base.
- Blend: Use dabbing or bouncing motions to smooth out harsh lines and create a seamless look.
- Bake: Press loose setting powder into areas like under the eyes or T-zone and let it sit before brushing it off.
- Contour: Apply cream or liquid contour products and blend them out for a natural sculpted effect.
How to Use Different Types of Makeup Sponges
| Sponge Type | Best For | How to Use |
|---|---|---|
| Classic Teardrop Sponge | Foundation, concealer, general blending | Dampen the sponge slightly. Use the rounded side for larger areas like cheeks and forehead. Use the pointed tip to reach under the eyes and around the nose. |
| Flat-Edge Sponge | Baking, contouring, precise application | The flat edge is perfect for pressing powder into the skin during baking. Use the angled sides to sculpt cheekbones with cream contour. |
| Mini Detail Sponge | Under-eye concealer, blemish coverage | Dampen slightly and use gentle tapping motions to blend concealer in tight areas like under the eyes or around the nose. |
| Silicone Sponge | Applying foundation with minimal product waste | No need to dampen. Apply a small amount of product directly onto the sponge and spread it over the skin. Follow up with another sponge to blend if needed. |
| Sculpting Sponge (hourglass shape) | Cream contour, highlighting | The curves help hug facial contours. Use one end for contour and the other for blending highlighter along cheekbones and temples. |
Pro Tips for Flawless Application
- Dampen your sponge before use (except silicone) — this helps prevent product absorption and gives a smoother finish.
- Avoid dragging or swiping; always use dabbing motions for better blending.
- Use different sponges for different products (e.g., foundation vs. powder) to avoid muddying your makeup.
Quick Reference Guide
| Technique | Sponge Shape Suggestion |
|---|---|
| Applying Foundation | Teardrop or Silicone Sponge |
| Blending Concealer | Mini Detail Sponge or Teardrop Tip |
| Baking Powder | Flat-Edge Sponge |
| Cream Contour/Highlight | Sculpting or Flat-Edge Sponge |
No matter what kind of look youre going for — natural glow or full glam — choosing and using your makeup sponge correctly will elevate your routine instantly.
4. Wet vs. Dry: When and Why It Matters
Knowing when to use your makeup sponge wet or dry can totally change how your makeup looks and feels. The right method depends on the type of product youre using and the finish you want—whether its a fresh, dewy glow or a flawless, full-coverage look.
💧 Using Your Sponge Wet
A damp sponge is your go-to for liquid and cream products like foundation, BB cream, concealer, and cream blushes. When you soak your sponge in water and squeeze out the excess, it helps prevent the sponge from absorbing too much product. This not only saves product but also gives a smoother, more natural-looking finish. A wet sponge blends everything seamlessly into your skin for that “second skin” effect.
Best For:
- Liquid foundation
- Cream blush or bronzer
- BB/CC creams
- Concealer (for lighter coverage)
Benefits:
- Dewy, natural finish
- Smoother blending
- Less product waste
🌵 Using Your Sponge Dry
A dry sponge is great for powders and when you want more coverage. Because it doesn’t absorb as much product or moisture, it allows you to pack on more pigment, making it ideal for setting powder or applying powder foundation. It can also be used to build up coverage with concealers or foundations if youre going for a full glam look.
Best For:
- Setting powder
- Powder foundation
- Baking under eyes or T-zone
- Concealer (for fuller coverage)
Benefits:
- More coverage
- Great for precise application
- Ideal for touch-ups on the go
Quick Comparison Chart
| Sponge Condition | Best For | Finish | Main Benefit |
|---|---|---|---|
| Wet (Damp) | Liquids & Creams | Dewy, Natural Look | Smooth blending, less product waste |
| Dry | Powders & Full Coverage Makeup | Matte or Full Coverage Look | More control, higher coverage |
The next time you reach for your makeup sponge, think about what kind of finish youre going for. Whether its a soft everyday glow or a bold evening look, using your sponge the right way makes all the difference.
5. How to Clean and Store Your Makeup Sponges
Keeping your makeup sponges clean is super important—not just for flawless makeup application, but also for your skin’s health. Dirty sponges can collect bacteria, oil, and leftover makeup, which may lead to breakouts or skin irritation. Heres a simple step-by-step guide on how to clean, dry, and store your beauty sponges the right way.
How Often Should You Clean Your Sponges?
Ideally, you should clean your makeup sponge after every use. If that’s not realistic for you, aim for at least once a week to prevent bacteria build-up.
Step-by-Step: How to Clean Your Makeup Sponge
What Youll Need:
- Mild liquid soap or gentle baby shampoo
- Lukewarm water
- A clean towel or paper towels
Cleaning Method:
- Wet the sponge: Run it under lukewarm water until fully saturated.
- Add cleanser: Apply a few drops of soap or shampoo directly onto the sponge.
- Lather and squeeze: Gently massage and squeeze the sponge to work out makeup residue. Do this for about 30 seconds.
- Rinse thoroughly: Rinse under running water while squeezing until the water runs clear.
- (Optional) Deep clean in microwave: Place your damp, soapy sponge in a microwave-safe bowl with water. Heat it for about 1 minute to kill bacteria. Let it cool before removing.
How to Dry Your Makeup Sponge
Squeeze out excess water using a clean towel. Then let the sponge air-dry in a well-ventilated area. Avoid storing it in enclosed containers while its still damp—this can lead to mold growth.
Best Storage Practices
Once your sponge is completely dry, store it properly to keep it clean and extend its lifespan. Here’s a quick comparison of storage options:
| Storage Option | Pros | Cons |
|---|---|---|
| Open Tray or Holder | Keeps sponge ventilated and dry | May collect dust if left uncovered |
| Mesh Pouch or Bag | Good airflow; portable for travel | Sponge must be fully dry before storing |
| Closed Container with Holes | Protects from dust; allows some airflow | If sponge is damp, may still trap moisture |
When to Replace Your Sponge
No matter how well you care for your makeup sponge, it won’t last forever. A good rule of thumb is to replace it every 1–3 months depending on usage and condition. Signs it’s time to toss it include tears, loss of shape, or lingering stains that won’t wash out.
Caring for your makeup sponges doesnt have to be complicated. With regular cleaning and proper storage, youll get smoother makeup results—and happier skin!
6. Signs It’s Time to Replace Your Sponge
Your makeup sponge is one of the hardest-working tools in your beauty routine, but it doesn’t last forever. Using a sponge past its prime can lead to patchy makeup application—or worse—skin irritation or breakouts. Here’s how to know when it’s time to toss your sponge and grab a new one.
🛑 Warning Signs to Look Out For
Keep an eye out for these common red flags that mean your sponge needs replacing:
| Sign | What It Means |
|---|---|
| Tearing or Crumbling | The sponge is breaking down and won’t blend makeup smoothly anymore. |
| Persistent Stains | If stains remain after washing, bacteria could be trapped inside. |
| Funky Odors | A bad smell usually means mold or bacteria has built up. |
| Loss of Shape | If it doesn’t bounce back like it used to, its no longer effective. |
📅 How Often Should You Replace It?
A good rule of thumb is to replace your makeup sponge every 1 to 3 months, depending on how often you use and clean it. If you’re using it daily, leaning closer to the 1-month mark is ideal. And always replace immediately if you notice any of the warning signs above—even if its sooner than expected.
Quick Tip:
To extend the life of your sponge, wash it thoroughly after every few uses and store it in a clean, dry place where air can circulate. Avoid sealing it in plastic bags or containers while damp, as this encourages bacterial growth.


