1. Choosing the Right Bronzer
Getting that natural, sun-kissed glow starts with picking the right bronzer for your skin. With so many shades and formulas out there, it can feel overwhelming—but don’t worry! Here’s how to choose a bronzer that works best for your skin tone and type.
Pick the Right Shade for Your Skin Tone
The goal is to warm up your complexion, not change your skin color completely. A good rule of thumb is to go one to two shades darker than your natural skin tone. Here’s a quick guide to help you choose:
| Skin Tone | Recommended Bronzer Shade |
|---|---|
| Fair | Soft peach or light golden beige |
| Light to Medium | Warm honey or golden tan |
| Medium to Olive | Rich caramel or bronze |
| Dark | Deep bronze or terracotta |
| Deep to Rich | Espresso or warm chestnut with shimmer options |
Selecting the Best Formula for Your Skin Type
The formula matters just as much as the shade. Different skin types work better with different bronzer textures:
| Skin Type | Best Bronzer Formula | Why It Works |
|---|---|---|
| Oily or Combination | Powder bronzer (matte) | Helps control shine and blends easily over foundation. |
| Dry | Cream or liquid bronzer | Adds hydration and gives a dewy finish. |
| Normal | Any formula works! | You can experiment with powder, cream, or liquid based on desired finish. |
| Sensitive or Acne-Prone | Mineral-based powder bronzer (fragrance-free) | Lighter on the skin and less likely to clog pores. |
Bonus Tip:
If youre new to bronzing, start with a matte powder bronzer—it’s beginner-friendly and easy to build up gradually without looking too intense.
Your Perfect Match Is Out There!
The right bronzer will enhance your natural beauty and give you that healthy-looking glow without looking orange or muddy. Take your time experimenting until you find one that blends seamlessly into your skin tone and suits your lifestyle.
2. Best Tools for Application
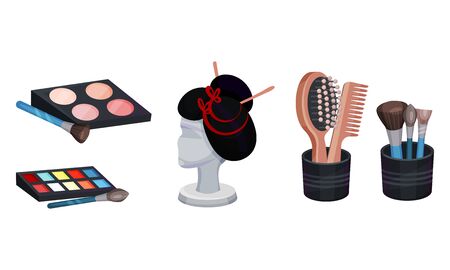
To achieve that flawless, sun-kissed glow, using the right tools is just as important as choosing the right bronzer. The proper brushes and application tools help you apply bronzer evenly, blend seamlessly, and avoid patchiness or harsh lines. Let’s break down the must-have bronzer tools and how to take care of them.
Must-Have Bronzer Brushes
When it comes to applying bronzer like a pro, not all brushes are created equal. Here are the best types of brushes to keep in your makeup kit:
| Brush Type | Best For | Why It Works |
|---|---|---|
| Angled Brush | Sculpting cheekbones and jawline | The angled shape hugs facial contours for precise application |
| Fluffy Powder Brush | All-over warmth on face and neck | Large, soft bristles distribute product lightly and evenly |
| Duo-Fiber Brush | Sheer, buildable coverage | Makes it easy to layer product without overdoing it |
| Sculpting Brush | Defined contouring with bronzer | Narrow shape allows targeted placement along cheekbones and temples |
Pro Tips for Using Your Tools
- Tapping off excess: Always tap off extra product before applying to your face to prevent heavy spots.
- Light pressure: Use a light hand when applying bronzer—this helps create a natural look rather than a muddy finish.
- Circular motions: Blend in small circular motions for a more seamless transition between your bronzer and foundation.
Caring for Your Brushes
Your brushes need regular cleaning to perform their best and keep your skin healthy. Heres how to maintain them:
Cleaning Routine:
- Weekly Deep Clean: Use a gentle brush cleanser or baby shampoo once a week. Swirl the brush under lukewarm water until clean, then lay flat to dry.
- Quick Daily Wipe: Use a spray brush cleaner after each use to remove surface residue and bacteria.
Storage Tips:
- Keep brushes in an upright holder so they keep their shape.
- Avoid closed containers that trap moisture—this can lead to bacterial growth.
The right tools make all the difference when it comes to achieving that natural bronze glow. With the proper brushes and a little care, youll be one step closer to bronzing like a true pro.

3. Mapping Your Face: Where to Apply Bronzer
To get that effortless, sun-kissed glow, its important to know exactly where bronzer should go. The secret lies in face mapping—strategically applying bronzer to the areas where the sun naturally hits your skin. This enhances your features and gives you a healthy, radiant look without appearing overdone.
Understand the High Points of Your Face
Bronzer works best when applied to the high points of your face—these are the areas that naturally catch sunlight. Think of where youd tan first if you spent a day at the beach. Typically, these spots include:
- Forehead (especially near the hairline)
- Cheekbones
- Nose bridge
- Jawline
The “3” or “E” Technique
A foolproof way to remember where to apply bronzer is using the “3” or “E” shape technique. With your bronzer brush, imagine drawing a number 3 on each side of your face—from your forehead down to your jawline:
| Step | Area | Why It Works |
|---|---|---|
| 1 | Forehead (near temples) | Adds warmth and frames the face |
| 2 | Cheekbones (below apples) | Defines and lifts facial structure |
| 3 | Jawline (along edge) | Adds dimension and balances overall look |
Pro Tip:
If youre unsure about placement, lightly tap bronzer on these three zones and blend well using circular motions for a seamless finish.
Tailor Your Application to Your Face Shape
Different face shapes may benefit from slight adjustments in bronzer placement. Heres a quick guide:
| Face Shape | Bronzer Placement Tips |
|---|---|
| Round | Focus on cheekbones and temples to add angles and definition. |
| Oval | Sweep across cheeks and forehead for balanced enhancement. |
| Square | Soften strong jawlines by blending bronzer along jaw and temples. |
| Heart | Add warmth to lower cheeks and temples to balance a wider forehead. |
Keep It Light and Build Gradually
The goal is a natural glow—not heavy contouring. Start with a light hand, then build up if needed. Remember, it’s easier to add more than to remove excess product!
4. Blending Techniques for a Seamless Finish
Blending is the secret sauce to making your bronzer look natural and flawless. No matter how perfectly youve placed your bronzer, harsh lines or uneven patches can ruin that sun-kissed vibe. Here’s how to blend like a pro so your skin looks effortlessly radiant — never streaky or muddy.
Choose the Right Tool
The tool you use can make a big difference in how your bronzer blends into your skin. Heres a quick comparison of popular options:
| Tool | Best For | Why It Works |
|---|---|---|
| Fluffy Bronzer Brush | Powder bronzers | Soft, tapered bristles diffuse product evenly |
| Dense Buffing Brush | Cream or stick bronzers | Packs product in and blends seamlessly into the skin |
| Damp Beauty Sponge | Cream or liquid bronzers | Presses product in for a natural finish without streaks |
Use Gentle, Circular Motions
Once your bronzer is applied to the key areas — cheekbones, forehead, nose, and jawline — start blending using small, circular motions. This helps soften the edges and melt the product into your skin for that diffused glow.
Layer Gradually
A common mistake is applying too much at once. Instead, build up color slowly. Apply a light layer, blend thoroughly, then add more if needed. Its easier to add than to take away!
Pro Tip:
If you accidentally apply too much bronzer or it looks patchy, use a clean brush or sponge to buff out the edges. You can also sweep a bit of translucent powder over the area to tone things down.
Troubleshooting Common Blending Issues:
| Problem | Solution |
|---|---|
| Streaky Finish | Switch to a softer brush or damp sponge; ensure your base isnt too dry. |
| Harsh Lines | Blend with circular motions; use a clean tool to diffuse edges. |
| Muddy Look | Use less product; choose a warmer bronzer that suits your skin tone. |
Mastering blending takes a little practice, but once you get it down, your bronzer will look like a natural extension of your skin — not just makeup sitting on top of it.
5. Common Mistakes to Avoid
Even if you’ve got the right bronzer and tools, small missteps can keep you from achieving that effortless, sun-kissed glow. Here are some common bronzing mistakes—and how to fix them—so your look stays fresh, natural, and flawless.
Using the Wrong Shade
Choosing the wrong bronzer shade is one of the most common issues. If your bronzer is too dark or too orange, it can look muddy or unnatural. Instead, pick a shade that’s just one to two shades deeper than your natural skin tone. Here’s a quick guide:
| Skin Tone | Recommended Bronzer Shade |
|---|---|
| Fair | Soft peach or light golden beige |
| Light to Medium | Warm honey or golden tan |
| Olive | Amber or copper tones |
| Dark | Deep bronze with red or gold undertones |
Over-Applying Product
Piling on too much bronzer can make your makeup look heavy and uneven. The key is to build up product slowly. Start with a light hand and add more only if needed. Always tap off excess powder from your brush before applying.
Applying in the Wrong Areas
Bronzer isn’t meant for your entire face—it should mimic where the sun naturally hits: the forehead, cheekbones, nose, and jawline. Stick to a “3” shape motion along the sides of your face for a flattering effect.
Skipping Blending
A harsh line between your bronzer and foundation can ruin an otherwise great look. Use a clean brush or beauty sponge to blend out any edges and soften the finish so everything looks seamless.
Using Shimmer in the Wrong Places
While shimmer bronzers can be beautiful, they’re best used sparingly. Avoid applying them all over your face—instead, reserve shimmer for areas like the tops of cheekbones for a subtle glow. For contouring or all-over warmth, stick with matte formulas.
Quick Fix Tips:
- If you applied too much bronzer, buff it out with a clean fluffy brush.
- If it looks patchy, use setting spray and gently press in with a damp beauty sponge.
- If its too dark, go over the area lightly with your foundation brush (without adding more product).
Avoiding these mistakes will help you get that effortless, just-back-from-vacation glow—without looking overdone or unnatural.


