1. The Rise of Clean Beauty at Home
In recent years, theres been a major shift in how Americans approach skincare and beauty. More and more people are saying goodbye to complicated ingredient lists and turning toward clean, non-toxic alternatives they can make right at home. This movement—often called the “clean beauty” trend—is all about using simple, natural ingredients that are good for both your skin and the planet.
One reason clean beauty has gained so much popularity is growing awareness about what goes into commercial products. Many store-bought lotions, scrubs, and cleansers contain synthetic chemicals, preservatives, or artificial fragrances that can irritate the skin or cause allergic reactions. As people become more ingredient-conscious, the idea of creating their own beauty products with pantry staples becomes more appealing.
From honey face masks to coconut oil lip balms, DIY beauty gives you control over what touches your skin—and it doesn’t have to cost a fortune. In fact, some of the best ingredients for glowing skin are probably already sitting in your kitchen.
Why Americans Are Embracing DIY Beauty
- Transparency: You know exactly what’s going into your products—no hidden chemicals or confusing names.
- Simplicity: Most recipes use 2–5 ingredients that you likely already have at home.
- Affordability: Making your own products often costs less than buying high-end “natural” brands.
- Sustainability: DIY reduces packaging waste and supports eco-friendly living.
Popular Pantry Staples Used in DIY Beauty
| Ingredient | Main Benefit | Common Uses |
|---|---|---|
| Coconut Oil | Moisturizing | Lip balm, body lotion, hair mask |
| Baking Soda | Exfoliating & Deodorizing | Face scrub, deodorant, toothpaste |
| Honey | Antibacterial & Soothing | Face mask, cleanser, lip scrub |
| Oatmeal | Calming & Anti-inflammatory | Face mask, bath soak, gentle exfoliator |
| Apple Cider Vinegar | Toning & pH Balancing | Toner, scalp rinse, acne treatment |
This back-to-basics approach is empowering people to take charge of their skincare routines while avoiding unnecessary chemicals. With just a few kitchen staples and some creativity, anyone can start making their own clean beauty products right at home.
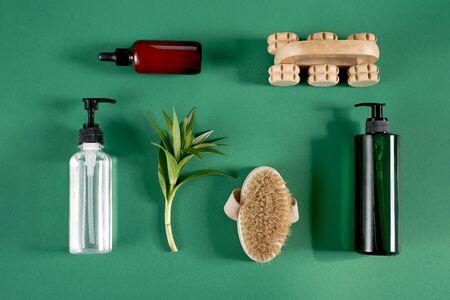
2. Pantry Staples That Double as Beauty Heroes
When it comes to clean beauty, you don’t have to look much further than your kitchen cabinets. Everyday ingredients like honey, coconut oil, and oats are more than just delicious pantry items — they’re also natural powerhouses for skin and hair care. These simple, affordable staples can help hydrate, soothe, exfoliate, and protect your skin without the need for harsh chemicals or expensive products.
Honey: Nature’s Moisturizer and Healer
Raw honey is a favorite in the DIY beauty world because of its antibacterial and humectant properties. It draws moisture into the skin while helping to fight acne-causing bacteria. Use it as a face mask, mix it into lip scrubs, or add it to your shampoo for a shine boost.
Quick Honey Beauty Uses:
| Use | How To Apply |
|---|---|
| Face Mask | Apply a thin layer of raw honey on clean skin. Leave on for 15-20 minutes, then rinse with warm water. |
| Lip Scrub | Mix 1 tsp honey with 1 tsp sugar. Gently rub on lips and rinse off. |
| Hair Shine Treatment | Add 1 tbsp honey to your conditioner or dilute with water and apply after shampooing. |
Coconut Oil: The Ultimate Multi-Tasker
Coconut oil is rich in fatty acids that nourish and moisturize both skin and hair. Its antifungal properties also make it great for scalp health. Whether used as a makeup remover or deep conditioning treatment, coconut oil is a go-to ingredient for many DIY beauty lovers.
Popular Coconut Oil Uses:
| Use | How To Apply |
|---|---|
| Makeup Remover | Scoop a small amount onto fingertips and gently massage onto face to dissolve makeup. Wipe off with a warm washcloth. |
| Body Moisturizer | Apply directly to damp skin after showering to lock in moisture. |
| Hair Mask | Warm up 1-2 tbsp of coconut oil and apply from roots to ends. Leave on for 30 minutes before washing out. |
Oats: Gentle Exfoliator and Skin Soother
If you have sensitive or irritated skin, oats are your best friend. Colloidal oatmeal (finely ground oats) helps calm inflammation, relieve itching, and provide gentle exfoliation. It’s ideal for dry skin conditions like eczema or sunburns.
Simple Oat-Based Treatments:
| Use | How To Apply |
|---|---|
| Soothe Bath Soak | Add 1 cup of finely ground oats to warm bath water and soak for 15-20 minutes. |
| Face Scrub | Mix ground oats with yogurt or honey for a creamy exfoliating scrub. |
| Cleansing Mask | Blend oats with water into a paste and apply as a gentle face mask for 10-15 minutes. |
The Takeaway: Your Kitchen = Your Clean Beauty Kit
You dont need fancy products to get glowing skin and healthy hair — just open your pantry! With natural multitaskers like honey, coconut oil, and oats on hand, youre well on your way to building a clean beauty routine thats both effective and budget-friendly.
3. Face First: DIY Skincare Recipes
Your journey to clean beauty starts with taking care of your face using ingredients you already have in your kitchen. With just a few simple pantry staples, you can whip up gentle facial cleansers, exfoliators, and masks that are free from harsh chemicals and full of skin-loving goodness.
Gentle Facial Cleansers
Cleansing is the first step to any good skincare routine. These DIY cleansers are mild enough for daily use and perfect for sensitive skin types.
| Recipe | Ingredients | Instructions |
|---|---|---|
| Honey & Oat Cleanser | 1 tbsp raw honey, 1 tsp ground oats | Mix into a paste, gently massage onto damp face, rinse with warm water. |
| Coconut Milk Cleanser | 2 tbsp coconut milk, 1 tsp aloe vera gel | Blend well, apply with cotton pad or fingers, rinse off after one minute. |
Natural Exfoliators
Exfoliation helps remove dead skin cells and reveal a brighter complexion. These natural scrubs are effective yet non-abrasive.
| Scrub | Ingredients | How to Use |
|---|---|---|
| Sugar & Olive Oil Scrub | 1 tbsp sugar, 1 tbsp olive oil | Massage gently in circular motions for one minute, rinse with lukewarm water. |
| Coffee & Yogurt Exfoliator | 1 tbsp used coffee grounds, 1 tbsp plain yogurt | Apply to clean face, scrub gently for 30 seconds, rinse off thoroughly. |
Soothing Face Masks
Masks are a great way to give your skin some extra love. Whether youre targeting dryness, dullness, or irritation, these DIY options offer a nourishing boost using items straight from your pantry.
| Mask Type | Main Ingredients | Skin Benefits |
|---|---|---|
| Avocado & Honey Mask | ½ ripe avocado, 1 tsp honey | Deeply hydrates and soothes dry or irritated skin. |
| Baking Soda & Lemon Mask (Use with caution) | 1 tsp baking soda, few drops lemon juice | Brightens and helps unclog pores—best for oily skin; patch test first. |
| Tumeric & Yogurt Glow Mask | ½ tsp turmeric powder, 2 tbsp plain yogurt | Evens tone and reduces inflammation; may stain light fabrics. |
A Few Tips Before You Start:
- Patch Test First: Always test new ingredients on a small area of your skin to check for allergies or sensitivities.
- Avoid Metal Utensils: When using ingredients like clay or turmeric, mix them in glass or wooden bowls to preserve their benefits.
Your pantry holds more skincare potential than you might think. With these easy recipes, youre just a few steps away from healthy, glowing skin—no trip to the store required!